Friday, June 13, 2008

how to love your knitting, part two

It has been a hard few weeks around here, and especially for handknits.

Some personal events have recently made it obvious to me that too many people put themselves last in their own lives. We pile on lists of duties for both our professional and personal lives, ignoring the question whether those chores will make our lives better or worse. Seriously ridiculous things get added to these lists, like saving up piles of fabric for that mysterious day when we'll actually have the time and motivation to make that perfect postage-stamp quilt, or keeping disturbingly ugly or hole-y knitting around just because at some point you had thought it was a good idea. Not only is it mental clutter, but it can take a serious toll on the state of your living space, as well. Some things are just better thrown out or donated.

You can see where this is going.

After staring at my own post for a few days I realized that that mitten was a bad idea. It was the wrong shade of red to match my red cashmere winter coat, and frankly I'm not throwing away that coat just because the mittens aren't working. They were floppy. They were embroidered with little stars. Do I even wear things with little stars? Have I ever owned anything with little stars?

Goodbye, single mitten. I have warm thoughts of you becoming a little home for a mouse in a dump somewhere.

Throwing out that mitten suddenly made me feel much better. I no longer had to think about eventually finishing the embroidery or making the other mitten. In fact, I could now throw away the scrap yarn that I had made with it, anyway. Do you know where that yarn came from? It was 24" long pieces from when I frogged Crichton. I didn't deserve to knit with that kind of pilly, old, short yarn. Goodbye, yarn. And goodbye to the rest of the frogged Crichton, too. (It didn't end up being much - only about one large Ziploc baggie.)

Now that I was digging around underneath my bed, searching for the rest of the Crichton yarn, I came across a whole container of yarn that I'd been saving up for a tesselating fish blanket. It was all acrylic and from the 1980s. Enough said. The potentially useful and un-knitted yarn was donated. The rest joined the now half-full bag in the garbage. Suddenly I had a whole empty container for my worthwhile yarn, and thus a storage problem that has been going on for about seven months was resolved.

At this point I was tired and pretty dusty, so the knitting massacre was, for the time, done. Before the end of the week, however, I went through my drawers and threw out all of my stockings, these green socks and the red/white socks, all because of truly disastrous holes. I also donated some mittens that had been accidentally shrunk in the wash. I find that getting rid of things actually makes you feel like you have more, because now all your nice stuff is easily accessible. My sock drawer is looking pretty well-dressed right now. For good measure I unraveled the very first project that I posted to this blog, too, because I'm kind of over frost flowers and leaves and the whole double-thickness lace scarf thing right now. Now I have two skeins of laceweight to use for one of the Victorian Lace Today scarves.

And, finally, after months of procrastination, I ripped out my Hourglass Sweater. I think I wore that sweater three times before it stretched out of shape permanently. Alpaca was a poor choice for that sweater, especially since I knitted it kind of loose.

For a little bit of time it was turning into a Vogue Knitting sweater.


However, I wasn't really sure that those cables were going to do anything for me, and by the time I got to the sleeves and realized that the pattern was completely wrong, I really didn't care enough to continue.


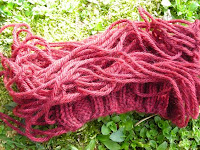
So, frogged again, this time in favor of the sideways-knitted cardigan from Poetry in Stitches. And there we have success. Although right now it just looks like a whole lot of garter stitch.

And finally, I feel like knitting again.

Join me, knitters of the world, in ridding yourself of too many duties, whatever that means to you. You're worth it.

Labels: , ,

Monday, April 09, 2007

how to love your knitting, part 1

(Note: for those of you who aren't interested in my babble, there are quite a few photos of new knitting projects interspersed with this entry. You can just scroll through and read the captions on them, if you prefer.)

One of the best parts about knitting is that one can make a garment to fit any size or shape. One of the worst parts is discovering that the pattern you want to make does not come in your size, is the wrong shape, or worse yet, calls for a yarn that you either can't afford or can not find. Perhaps the easiest way to get around this is to only knit patterns that you have designed yourself, but even the most talented designers sometimes just want to knit somebody else's pattern. And let's face it, if you find the perfect sweater, why re-invent the wheel?

The absolute easiest way to change a sweater's general size is by playing with the gauge. You do need to knit a swatch and measure, but it's very easy and totally worth the results. I find that there are two different scenarios when you find a sweater that needs its size tweaked: you either have yarn that you already have in mind, or do not yet have any yarn and are looking for which yarn to buy. I will discuss these in order:


You have yarn, you have a pattern, but the size is either too big or too small:

1. The Swatch.

I read a lot about people who say that swatches "lie", and that they don't bother knitting them because they are not an accurate representation of the sweater. I think this is because there are many misunderstandings about what you need to do with a swatch in order for it to work for you. I also have heard the explanation that a swatch "wastes" yarn, and that the knitter only has a limited amount. It is very easy to frog the swatch after you've made the pertinent measurements and re-use the yarn - trust me. After seeing me work my way through the ripped-out Crichton yarn, you know that I'm not one to waste a yard of yarn.

The first step with swatching is, obviously, to pick up some of the yarn you have chosen and a set of needles. Since the pattern's gauge is not going to matter to you, you get to choose any needles you want, so long as you like the fabric that they produce. Generally, you will want a needle that is about the same thickness as the yarn. If you are a loose knitter, you will need to go with a needle that is a little smaller than the yarn. If you're a tight knitter, you will need to go with a needle that is a little larger. Knit a few rows, and if the fabric looks bad, switch your needle size accordingly.
The second step to swatching is making sure that you swatch "in pattern". Usually this is stockinette, but if the sweater has a different stitch pattern (cabled, lace, etc.) you must knit your swatch in that. If it's a good pattern, it will tell you which stitch pattern they want you to swatch. It's generally whatever the majority of the sweater is knitted in.

Now, the knitting. This is where you need to be the most careful. You are going to want to cast on enough stitches to successfully measure your gauge. This is about 4 inches, or 10 centimeters. I know it seems boring, but it will go very quickly, and it's so much better than finishing an entire sweater and discovering that you will need to adopt an orangutan into your family so that it will fit someone.


There are also other advantages to swatching - here, you can see that I originally tried a cable pattern. I discovered that not only was the cable pattern given incorrect, but it really did not show off the yarn nicely at all. It was much easier to discover this after casting on 30 stitches, rather than discovering it after I had cast on enough for an entire body of a sweater.

Yuck.

During this step, you are also going to want to take note of how you are knitting - are you wrapping the yarn tightly, or letting it fall as it may? I was practicing my continental knitting (I am an English knitter, originally), and was careful to feel just how I was knitting. This is also another good reason to make a good-sized swatch. Not only does it allow you to "feel" your knitting, but it also gives a more accurate representation of how you will be knitting when you start your sweater. If you only knitted an inch-wide swatch, your knitting style would be much different than an entire sweater, since you would be knitting a little tighter in that small space.


In this swatch, I was using a cotton yarn with some elastic, and had to make sure I didn't tug the yarn too tightly in order to get a correct swatch. Blocking will take care of the small irregularities that are bound to happen. You'll be seeing more of this swatch in a later post.

Also important: if the sweater is knit circularly, you must knit your swatch circularly. You can do this on double-pointed needles, but my favorite trick is to take a circular needle, cast on enough stitches for your swatch, and work one row. Next, slide the knitting to the other end of the needle, take the working yarn and make a big loop (think a loop about a foot long - you absolutely do not want it too tight, since it will make your swatch buckle in on itself), bringing it up to the work and knitting the next row. Slide the swatch to the other side of the needle and do it again. By doing this, you're only knitting on the right side of the work, thus giving you a swatch that is representative of circular knitting.

The back will look something like this. It's crazy, but it works.

The final step with your swatch is also very important. After binding off, you are going to wash and dry your swatch in exactly the same method in which you will be washing and drying your sweater. Swatches can change dramatically during this step. I usually measure the swatch before I wash and dry it, and then afterwards, just so I can see the difference. I would suggest measuring it over two inches, and make sure that you measure right in the center, since your stitches will be the best there (don't count those edge stitches, they are always pulled out of shape and will give you a bad measurement). It is also helpful to measure before and after the wash, since while you're knitting it you may become a little panicked about the size, and if you compare your gauge at that moment to the original gauge, you can comfort yourself that the size will be correct after it is washed and dried. For my swatch, I soaked it in the sink in cold water with some baby shampoo, rinsed it, and let it dry flat. The wool grew and made my final gauge 10 stitches/2 inches and 14 rows/2 inches. After you have measured your real gauge from your washed and dried swatch, you will feel an overwhelming sense of satisfaction and pride. No longer will you knit the perfect sweater, only to clean it and discover that it has now grown in width and length - or worse yet, refuse to wash it at all.


These socks were knit from the same yarn, with the same needles, in the same week. The bottom one was washed and the top one was not. Their heels are lined up exactly - the size difference you see is entirely from being wetted and dried. They are the Buds and Blossoms socks designed by Katherine Misegades.

2. Your Gauge.

Now you have a fresh, beaming little swatch, and are almost ready to tackle the whole sweater. The final step is calculating your gauge. You've already measured your gauge from both your pre-washed and washed swatch. You are only going to bother right now with your washed swatch's gauge. Let's say that it is 10 stitches/2 inch. We divide that, and find that it is 5 stitches/1 inch. If you divide and find a fraction, make sure you use that fraction! The little bits can add up and really alter the size of your sweater.

Next, we look at the pattern. I used pattern #20, a cowl neck sweater, from the fall 2006 issue of Vogue Knitting. The pattern gives instructions for four different sizes, that range from a 34" bust to a 46" bust. This does not matter. The sizes and inches given are only for their gauge, and since we have our own, we can cheerfully ignore them. The only important information is the number of stitches given for the bust. This is usually about the same as the cast-on amount, and in this pattern it is equal to that amount. I converted this pattern to be knitted circularly, so the number of stitches I was casting on was the total amount for the body. As per the pattern, these are either 144, 160, 180, or 196 stitches. If your pattern is knitted flat, you will be adding up the number of stitches from the back and front, subtracting 4 as those are used in seaming, and then using the remaining number to calculate your size.

To find out which one of these cast-on amounts I needed to use, I took my gauge of 5 stitches to 1 inch and started to divide. The first cast-on amount would give me, with my gauge in my choice of yarn and needles, 28.8" (144 stitches / 5 stitches per inch = 28.8 inches). The second number gives me 32" (160 stitches / 5 stitches per inch = 32 inches). The third number would give me a 36" bust, and the final number would give a 39.2" bust. I chose the size that suited me the most, and cast on.

The beauty of this method is that now you do not have to worry about any more math, and the inevitable crossing out and re-writing of instructions that comes with it. You can cheerfully follow the instructions for the cast-on amount, and whether the pattern lists that as a small or an extra large, you can be confident that it's going to turn out to fit you beautifully. There is one small hiccup with this plan, and this is your row gauge. Many patterns will just tell you to knit for a certain amount of inches, but occasionally will tell you to work a decrease every 10th row, as this pattern did. To find out how many rows that would require you to knit, you will need to do just a tiny bit more math. This is what I do:

I need to decrease every 10 rows. What the pattern is really telling me is that I need to decrease over a certain amount of inches, but the designer has tried to be helpful and simplify it for me (it is amazing how many patterns, and particularly American ones, try to over-simplify and just make you more clueless). I take a look at the pattern's gauge, and see that this was written for a fabric that measures 4.25 stitches per inch, and 5.5 rows per inch. So really, 10 rows is 1.8 inches (10 rows / 5.5 rows per inch = 1.8 inches). I look at my row gauge, which is 7 rows per inch, and now calculate how many of MY rows would equal 1.8 inches. 7 rows x 1.8 inches = 12.6 rows. Since it's impossible to knit .6 of a row, I just round it up to 13 rows. Now I know that I really need to decrease every 13 rows, in order to have the waist shaping come out correctly.

If that confuses you, this is all you need to do:

1. Using THEIR gauge, find the number of rows per inch. (Generally a gauge is given over 4 inches, so you'll probably be dividing the numbers they give by 4.)

2. Look at the amount of rows that the pattern wants you to increase or decrease over.

3. Divide your answer from #2 by the answer from #1. (#2 / #1)

4. Take a breather. I didn't like math in school, either.

5. Look at YOUR row gauge per inch.

6. Multiply your answer from #3 by your answer from #5. (#3 x #5)

7. You're left with the number of rows that you're going to need to decrease or increase over. Cool, huh?
Is it worth it? I think so.


Cowl neck sweater from Vogue Knitting, Fall 2006. The yarn is Cascade 220, the Heathers collection. Every modification I used is listed above. It is my new favorite sweater.


You have a pattern, but the sizes aren't ideal. You still need to buy yarn.

You're going to love this method.

For example, I'm going to use the cardigan I'm making from Poetry in Stitches. The only sizes given are for a bust of 40 inches or 43 inches. I know right away that these sizes are not going to work for me, and that I'll need something much smaller. I tried to fool around with the design, but ultimately it was just too fiddly.

1. The Only Step.

Figure out what bust size you'd like best. You can do this by measuring around yourself and guessing at how much ease you want, or by measuring a sweater that you like. Look at how many stitches you will have on the needles at the bust (most likely about equal to the cast-on number). For this pattern, my choices are either 289 stitches or 309 stitches.

Either those 289 stitches or 309 stitches are going to give me a width of 36". It's just a matter of which one I'd like to pick. I divide 289 stitches by 36 inches and get 8 stitches/inch. 309 stitches divided by 36" gives me 8.5 stitches/inch. I now know that I'm going to want to find a yarn that gives me one of those gauges. As luck would have it, the Morehouse Merino laceweight yarn gives me exactly 8.5 stitches/inch, so all there was left to do was buy a whole bunch and dust off my needles. The same rules about row gauge apply, as detailed directly above the bold text. Beth had asked me if the Morehouse was a direct substitute, and I saw quite a few Google queries about it, so for those of you searching, please know that it is not going to give you the same gauge as the recommended yarn. In this case, though, it gives me a better gauge, and you may find the same.
Jen asked how to determine how much yarn you're going to use. After doing this a few times you'll have a good idea, and some yarn ball bands even tell you how much you need for a certain size sweater. If you need some help for now, though, check out this webpage in HTML or PDF format.

Two flower repeats in. I've finished the increasing and am now working straight to the armholes.

Labels: , , , , ,

Thursday, April 27, 2006

vogue cardigan continues

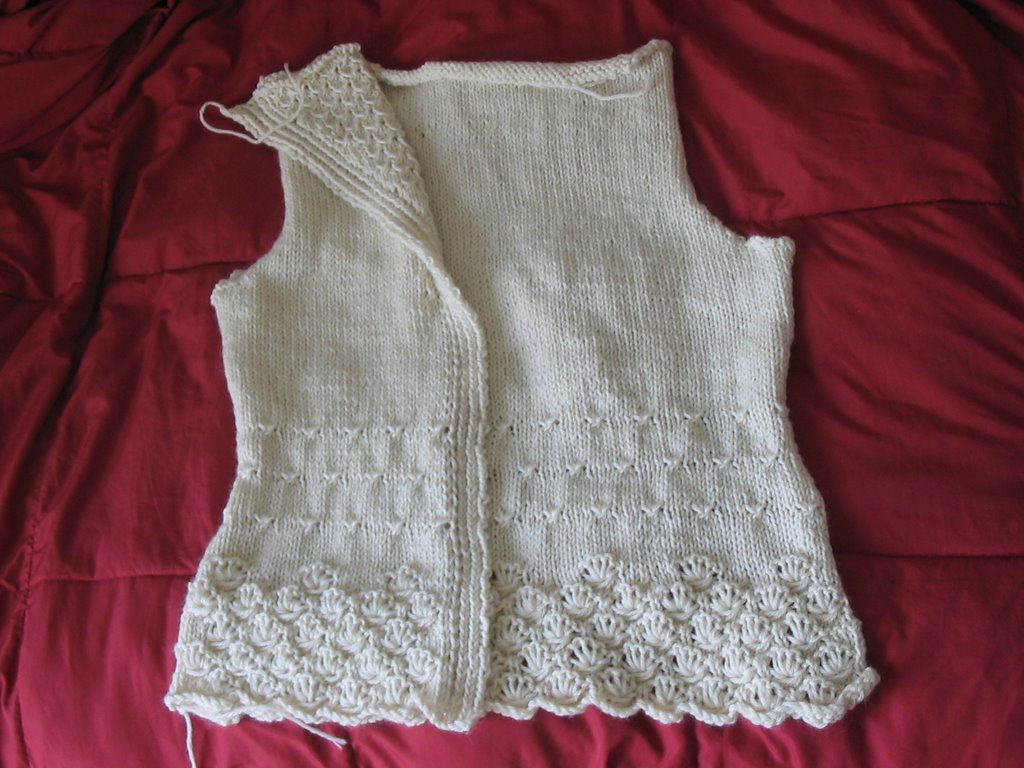
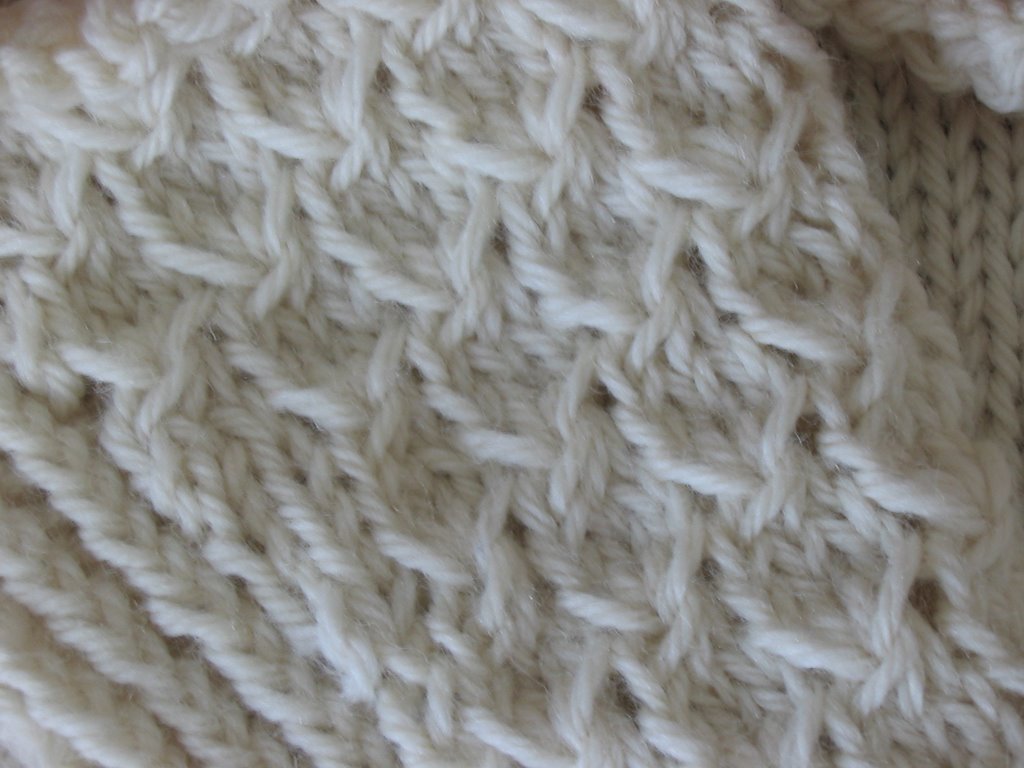
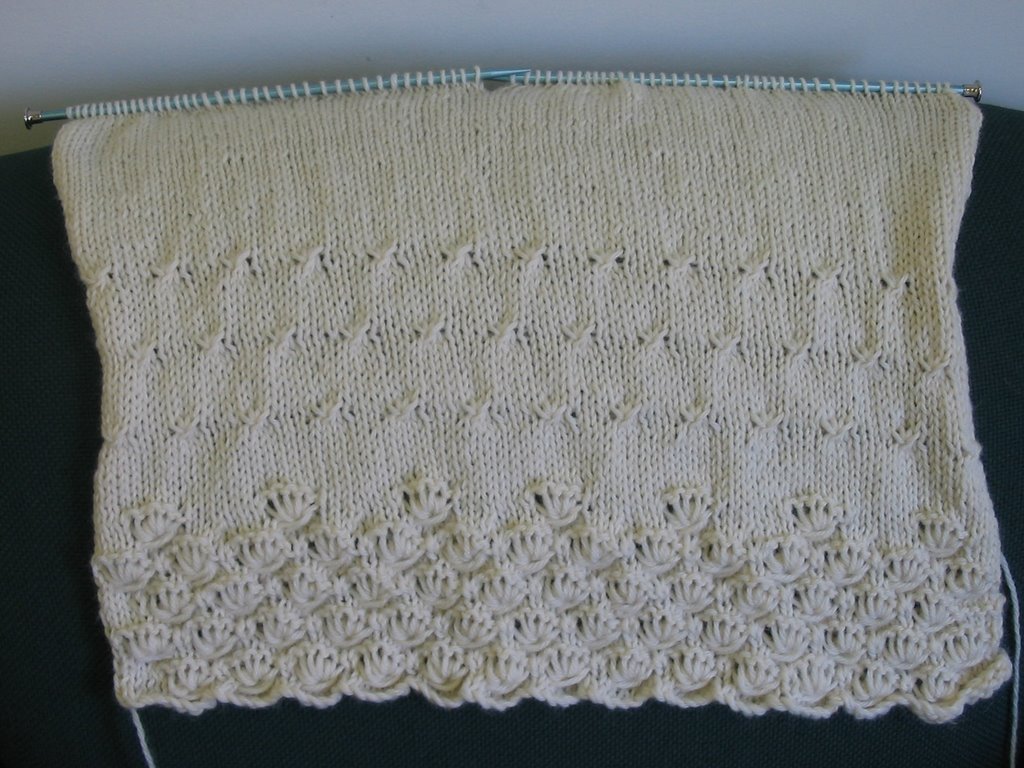
The Vogue cardigan #34 is coming along nicely. As you can see, the back and half of the front are completely done. I've reversed the back so that you can see the patterning in this picture. The second half of the front is currently on the needles. I've just completed the last row of knots on it, so I'm about halfway done. I like the design of this a lot (even if I do have to seam it later). As you can see, the front folds back to show a series of knots around the neck. I like working that pattern - it breaks up the monotony of stockinette, but isn't so difficult that you need to keep on referencing the pattern. I'm also happy that I used the Cascade 220 that I had waiting for a sweater. I don't think I would have been very happy with the more summery blend that was recommended in the magazine. I think my stitch definition is much nicer than the modeled sweater, too. I am enjoying the warm weather here, but I hope we have at least one more drop in temperature so I can wear this sweater soon.


Labels: ,

Sunday, April 16, 2006

Vogue belted cardigan (spring '06)


While Vogue Knitting magazine can sometimes come out with really vile stuff, there is usually at least one project in each issue that I like. This time it was #34, the Belted Cardigan. I had been wanting to make a cardigan out of some Cascade 220 that I had, and this pattern was (almost) perfect. I'm making the sweater shorter, with only 13" from hem to underarms instead of 15". I'm also going to add snaps so that the cardigan can close, and I'll be getting rid of the belt. So far it has been a very quick and enjoyable project. I'm using #8 needles, and the material is flying out. I'm already up to the armholes after only two days of knitting.

Labels: ,